Showing posts with label Cowbell. Show all posts

Monday, December 7, 2015

Classroom Rhythm Instruments - Let's EXPLORE the Jingle Bells ☺

File:Sleigh Bells.jpg


For many people, singing is the most natural way to PERFORM music. Sadly, not all people will participate in singing activities for a variety of reasons; shy, self-conscious to name a few. Some children are no different.

There are many skills required in learning to sing a new song especially for young children who are just beginning to learn to read words. Not only do they need to remember the words, there is the understanding of the words, pronouncing the words and remembering how the Melody goes. This is a lot for our younger school aged children.

Classroom Rhythm Instruments give INSTANT SUCCESS and confidence. The Rhythm Games and Activities are EASY. For me, there is always full participation and the students are CREATING music without really trying!


Here is a Classroom Rhythm Instrument Activity from my "Piggyback Song Activities for Rhythm Band and Boomwhackers Pack 1 PreK-1"


“WHERE IS MY BAND?” (Where Is Thumpkin?)
Abbreviated Version


1.       Where are the DRUMS?
   Where are the drums?
   Here we are.                                                                                                                 
   Here we are.
   Listen to our drums.
   Listen to our drums.
  Ta-Ta-Ta-(pause) or 1-2-3-(pause)
  Ta-Ta-Ta-(pause) or 1-2-3-(pause)

2.       Where are the CYMBALS?
3.       Where are the RHYTHM STICKS?
4.       Where are the TAMBOURINES?
5.       Where are the SAND BLOCKS?
6.       Where are the TRIANGLES?
7.       Where are the MARACAS/SHAKERS?
8.       Where are the JINGLE BELLS?

9.       Where is my BAND?
  Where is my band?
  Here we are.
  Here we are.
  Listen to us play.
  Listen to us play.
 Ta-Ta-Ta-(pause) or 1-2-3-(pause)

 Ta-Ta-Ta-(pause) or 1-2-3-(pause)


TRADITIONAL CLASSROOM RHYTHM INSTRUMENTS

Starter List

Hand Drums
Bongos
Maracas
Shakers
Triangles
Tambourines
Claves
Tone Blocks
Woodblocks
Jingle Bells (Wrist)
Rhythm Sticks
Sand Paper Blocks
Small / Finger Cymbals
Cowbell


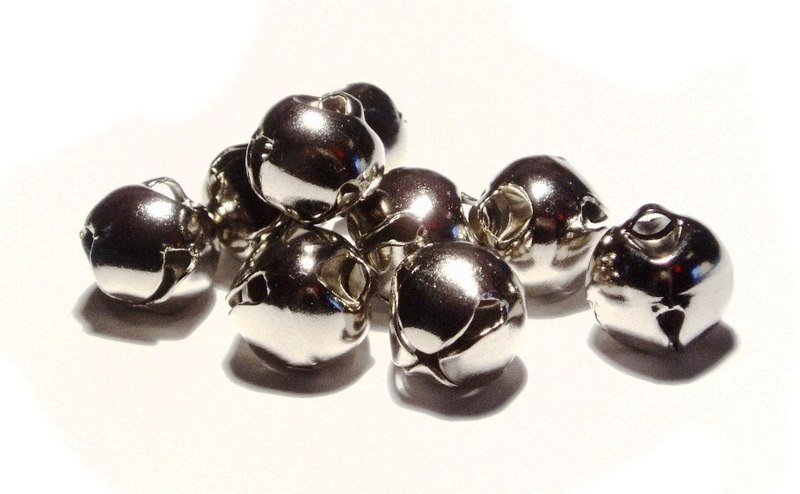
In my October 19, 2015 Post "You Got Rhythm", I talked about some playing techniques for the Cowbell and Claves. Today "Let's EXPLORE the JINGLE BELLS" 

  • SHAKER INSTRUMENT: makes its sound by the rattling of small metal objects inside a larger metal object.
  • SOUND is Bright and Sharp
  • STYLES: Bells on Bracelets (plastic or Velcro) {if your bracelets are Velcro let the children have a minute to pull them off and reattach them again, to get it out of their system!}, Attached to a Wooden Handle, you can CREATE your own bracelet by weaving a Pipe Cleaner through the Jingle Bells.
  • WEAR the Jingle Bell bracelets on wrists or ankles
  • Hold the Bells in your hand
  • Slide a bracelet around a Plastic Drinking Cup 
  • When first introducing the Jingle Bells, talk to your students about what it is made of and compare it to other Rhythm Instruments they have played.

SAMPLE QUESTIONS:
  1. What are RHYTHM STICKS made out of? [wood]
  2. What are MARACAS made out of? [wood, beans, plastic, beads, rice]
  3. How do JINGLE BELLS make their sound? [shake them]
  4. How do RHYTHM STICKS make their sound? [tap, scrape]
  5. What else is made out of metal?
♫Pass the bracelet around and allow each student to shake it and look it over♫


DIFFERENT WAYS TO PLAY JINGLE BELLS

  • SHAKE it Up and Down
  • SHAKE it from Side to Side
  • Make a Circle in the air
  • TAP them Gently in the Palm of the other hand
  • SHAKE behind Back
  • RUB them on your Tummy


Easy Listening Game: "BELL or __________ ?"


  1. Choose another Rhythm Instrument to pair with the BELL
  2. Have class sit in a circle
  3. 1 by 1 have a student sit with their back to the group and close their eyes
  4. You play either the BELL or the other RHYTHM INSTRUMENT for a few seconds
  5. Ask the student which Instrument they heard


  1. Put on some MUSIC with a Moderately Fast Beat
  2. Have students COPY your Different Playing Motions


BELLS FREEZE DANCE


  1. Have students attach the BELLS around their WRISTS or ANKLES
  2. Play some fun DANCE MUSIC
  3. Everyone DANCES until the music STOPS
  4. When the MUSIC STOPS, the children "FREEZE" like statues
♫The BELLS make it more of a challenge♫


I combined the JINGLE BELLS and PLASTIC DRINKING CUPS to help improve my students RHYTHM skills while CONNECTING the SEASON by CREATING Music with Traditional and Non-Traditional CLASSROOM RHYTHM INSTRUMENTS.

I slid a WRIST JINGLE BELL bracelet around the OUTSIDE of a PLASTIC DRINKING CUP (as pictured above) and created new original RHYTHMIC PERCUSSIVE ARRANGEMENTS to "Play Along with" the original artists of "Dominic The Donkey", "Jingle Bell Rock" and "Rudolph The Red-Nosed Reindeer".


Click on the link above to see the product and download a preview


  1. READ Verse 1 of "Jingle Bells", one sentence at a time, asking the corresponding question/s immediately AFTER reading the sentence.

QUESTIONS:

  • What are we dashing through? [snow]
  • What color is snow? [white]
  • What are we dashing through the snow in? [sleigh]
  • What animal is pulling the sleigh? [horse]
  • How many horses are pulling the sleigh? [1]
  • What are we going over in the sleigh? [fields]
  • What colors are the fields before the snow? [green/yellow/etc..]
  • Are we laughing or crying "all the way"? [laughing]
  • What is the name of the horse? [Bob]
  • What are on Bob's tail? [bells]

2. Sing "JINGLE BELLS"! (Have students play their bells along with the chorus)


Karaoke Version no lead singer, just instrumental


for all you do!


Have a Great Day and remember to take time for yourself EVERYDAY!


Donna Marie & Mary

Monday, October 19, 2015

You Got RHYTHM


"What is my ______ doing?"


Remember cousin Susie's wedding reception when everyone was up on the dance floor doing the "Y.M.C.A." You look back at Great Aunt Matilda sitting at the table watching everyone's purse and her FOOT is TAPPING up & down.

Remember cruzin' down Main Street with your best friend, blaring "Bohemian Rhapsody" on the radio and you found yourself HEAD BANGING up & down! You know the part ;)

How about the time on the beach with the band playing "Three Little Birds" and you found yourself SWAYING your head forward and backward like a chicken head?

What was causing the FOOT TAPPING, HEAD BANGING and SWAYING?

The STEADY BEAT!


Isn't "the BEAT" the same as "the RHYTHM"?


  • No
  • To put it simply, the "BEAT'S" length of sound is even, STEADY, constant. Like the ticking of an old fashioned grandfather clock. 
  • The "RHYTHM'S" length of sound varies. It changes with the Notation Symbol.
  • The Musical Term that is more of a match with "beat" is TEMPO, which deals with how "fast/slow" the "beat" is moving in time.
  • Rhythms are "patterns" of "long and short" sounds and silences.

For example: Sing the first 6 words to The Beatle's song, "A Hard Days Night".
It's Melodic Rhythm Pattern is:
  1. Short 
  2. Short
  3. Short 
  4. Long 
  5. Long 
  6. Long


Playing Techniques

2 Classroom Percussion Instruments


There are other playing techniques for these instruments. I am sharing with you the playing techniques my students found successful.


COWBELL

The Mouth of the Cowbell is the wide, open end.
The Heel of the Cowbell is the narrow, closed end.

  • Place the Cowbell in your non-dominant hand (the hand you do not use to write with), Mouth facing AWAY from you.
  • For a Muted Sound, keep the Cowbell touching the palm of your hand.
  • For a Fuller, Louder Sound, hold the Cowbell away from your palm using your fingertips.
  • Strike the Cowbell with a Rhythm/Lummi or Drum Stick.

This is a great instrument to use to keep the group/ensemble on the STEADY BEAT because its sound can be heard over all the other instruments.


CLAVES

  • Pretend you are holding a Hot Dog Bun in your non-dominant hand.
  • Place 1 Clave in your Hot Dog Bun along side your thumb (see picture above)
  • To create the Resonating Chamber, tell your students to leave room under the Hot Dog (Clave) for the chili, peppers and onions. Holding the Clave with your THUMB and FINGERTIPS.
  • Strike the Clave in the MIDDLE with the other Clave.


SKILL BUILDING: 

RHYTHM TEACHING OPTIONS


Looking at the global phrase, "if you can SAY IT, you can PLAY IT!"; here is a 3 Step RHYTHM TEACHING Formula I have found extremely successful with my wee little Preschoolers to my veteran Adults.

Step 1: VOCAL     Step 2: BODY PERCUSSION     Step 3: INSTRUMENTS


VOCAL

  • CHANTING, SPEAKING the words, syllables or phrases is an immediate, natural response to rhythm
  • Depending on the ages of your students, this can be taught by Rote (Echo), Picture Icons, Actual Word Reading

BODY PERCUSSION
Adds a Motor Skill Element

  • CLAPPING is the simplest and the most familiar action response to begin to FEEL the Rhythm
  • SNAPPING, PATSCHEN (patting on thighs) and STAMPING are natural Body Movement extensions of Clapping

INSTRUMENTS
Combines the Motor Skill Element with the Manipulation of a Physical Object

Gives the Students the experience, the feeling of:
  1. Rhythmic Stability
  2. Contrasting Rhythm Patterns and Tone Colors
  3. Independent Performing
  4. Ensemble Performing


RHYTHM CIRCLE


  • On the Board or from Memory, have a List of Vocabulary Words, Math Problems, Days of the Week, Months of the Year, Composer Names, Musical Instrument Names, Music Vocabulary Words, etc... the possibilities are endless!
  • Have various Classroom Rhythm Instruments arranged on the floor creating a Large Circle.
  • When your students arrive, tell them to sit behind an Instrument. Do not touch the Instrument until instructed to do so.
  • Assign the STEADY BEAT Instrument. Do Not use this Instrument in your circle of instruments.
  • Going around the Circle, each Individual Student performs a different word/phrase pulse/s from the list.

Example List: Months of the Year
  • Student 1: January
  • Student 2: February...
  • Student 12: December
  • Student 13: January
  • Student 14: February...etc
until all have had a chance to perform or as many times around the circle you would like to go.


Circle Performing Options


  1. CHANT Word Pulses ONLY (with Steady Beat Instrument)
  2. CLAP Word Pulses ONLY (with Steady Beat Instrument)
  3. BODY PERCUSSION and CHANT Word Pulses (with Steady Beat Instrument)
  4. BODY PERCUSSION Word Pulses ONLY (with Steady Beat Instrument)
  5. INSTRUMENT and CHANT Word Pulses (with Steady Beat Instrument)
  6. INSTRUMENT Word Pulses ONLY (with Steady Beat Instrument)


for all you do!


Have a Great Day and remember to take time for yourself EVERYDAY!

Donna Marie & Mary